CNAME RECORDS
-
A CNAME, or Cononical Name, record tells DNS that this hostname is an alias of another domain name. This hostname then ends up resolving to the same IP address as the target domain name.
-
For each CNAME record you can choose an alias and a host. However here are some restrictions that apply when doing so and they are as follows :
-
A CNAME must have no records of other types (MX, A, etc). This is very important especially with the @ record. If you specify a CNAME record type for the @ hostname, then email will not route properly for this domain name.
-
CNAME records that point to other CNAME records should be avoided. It is possible to create infinite loops and other error conditions.
-
Other DNS record types that point to other names, such as NS, MX, PTR and SRV should never point to a CNAME.
-
Â
How to add a CNAME record using CPANEL
Â
This tutorial will assume that you are already logged into your cPanel account, Follow the below given steps to add a CNAME through cPanel;
-
Once in the cPanel interface scroll down till you come across the "Domains" section. From there click on the "Zone Editor" icon/option.
-
If step one was followed correctly you will be directed to the "Zone Editor" page where you can successfully set a CNAME record. Once in the "Zone editor" page there are two methods in which you can add a CNAME record and they are as follows:
-
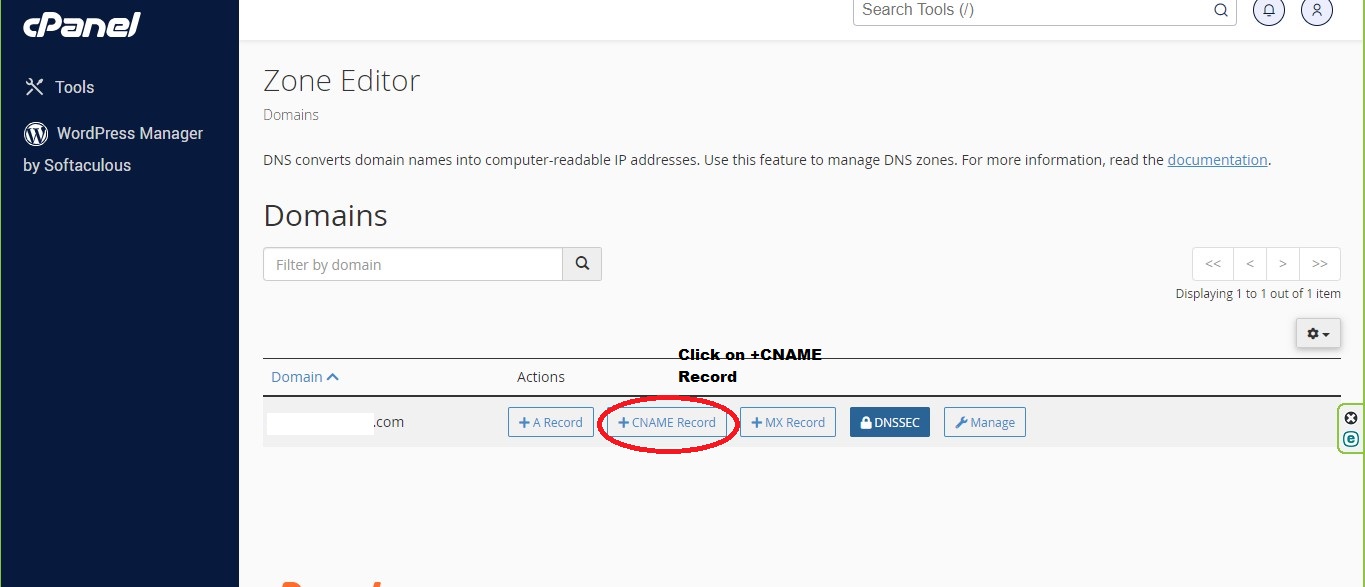
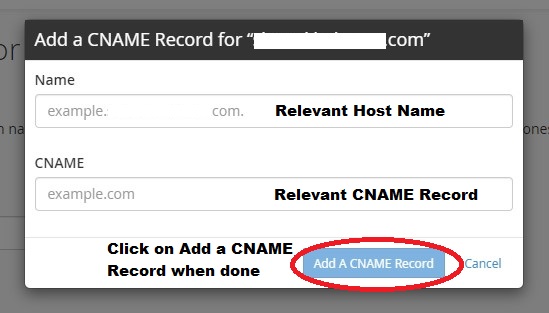
Click on the "+ CNAME Record" button which will open a pop up dialog box prompting you to enter the relevant host name and relevant CNAME. Once details are filled in correctly click on "Add a CNAME Record" button which will add the CNAME record.
-
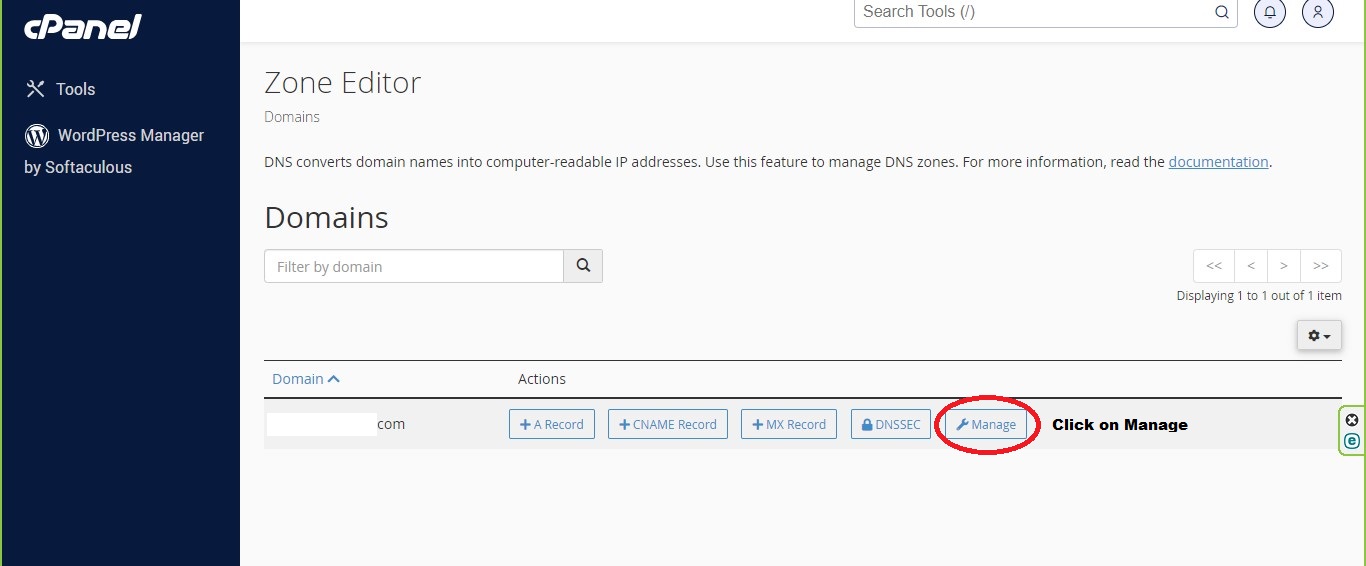
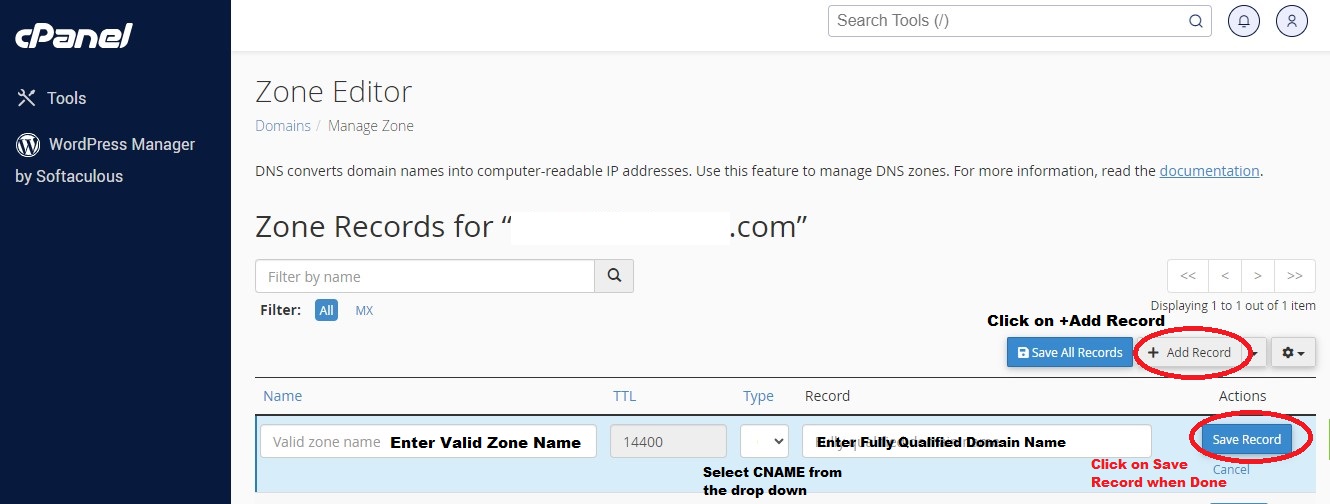
Click on the on the "Manage" button with a spanner icon which will display all the zone records associated to that relevant domain name. Once in the page click on "+ Add Record" button which will let you enter the relevant details when adding a CNAME record. After entering the relevant information click on "Save Record" option.
-
If the above steps are followed correctly in order you will be able to add a CNAME record successfully
Â
VISUAL GUIDE
Â
STEP 01:

STEP 02:

STEP 2.2:

OR
STEP 02:

STEP 2.2:

Â

